Dashboard
Get to know the TrustYou Dashboard
The Dashboard is a great way to see the most important reputation metrics about a hotel in one place. Across the top of the Dashboard Tab, you’ll see the name of the hotel you’re currently viewing (the default shows your own hotel’s data), the time-frame you’re looking at data from, and the option to add tiles or export data from your Dashboard.
To make the data you see easier to understand, all of the data points in TrustYou have been normalized to the scale that you’ve selected in Settings. If you’d like to see data on a different scale, click Settings near the top of your screen to change this.
Overview data is displayed in tiles below the hotel’s name. Click any tile to see a more detailed view of the data presented. Click the tile again to exit the detailed view.
Customize the information presented on your Dashboard
Filter the data in your Dashboard by date
Change what time period you see data for by clicking the button showing the current time-frame near the top of the Dashboard Tab.
Note: Keep in mind that times listed as “Previous X Month(s)” only reference the past complete months/years. For example, if today is May 15, and your Dashboard is set to Previous 3 Months, you’ll see data from Feb 1 to April 30.
Add, organize & remove tiles from your Dashboard
Click Add Tiles to add new tiles to your Dashboard. You’ll be able to add any tile that doesn’t already exist on your Dashboard. Click and drag a tile to move it on your Dashboard.
You can remove tiles by clicking the x at the top corner. When you remove a tile, it’s not deleted permanently—you can always add it back by clicking Add Tiles.
Understand your Overall Score
Your Overall Score uses TrustYou’s special algorithm to score your hotel. The most recent reviews are given more weight than older reviews to calculate this score. The past 24 months of review data are used when calculating the Overall Score, so even though it may be slow to move, it gives a great picture of your hotel’s sustaining performance.
You’ll notice that alongside your Overall Score, this tile also includes a sentiment about the performance of your hotel. Because your Overall Score considers a larger range of data than most of the other available metrics, it’s an important indicator as to how well your hotel performs as a whole. Here are the thresholds:
- Excellent: 86 – 100
- Very Good: 80 – 85
- Good: 75 – 79
- Fair: 68 – 74
- Poor: 0 – 67
When you click the tile to expand it, you can see information about the review sites that we use to calculate your Overall Score and how the score has changed over time.
Get an overview of your hotel’s performance
The Performance Tile shows the performance score over time – which is an average of your hotel’s ratings over the time period you’ve selected. Unlike your Overall Score, newer reviews aren’t given any more weight in this calculation – it’s a simple average.
For example, the Performance Score is an average of all ratings received in May—68 of 100 (or 3.4 of 5).
When you click the tile to expand it, you will see information on how this has changed over time for your hotel.
You are also able to see a bar graph showing the review distribution over the time period selected, separated into positive and negative.
If your account has a Performance goal and it is meant to be completed at the end of the selected timeframe or later, then the graph shown in the Performance tile will show 2 additional lines: one representing the goal target (red) and one representing the goal current value (yellow).
Impact Scores
Impact Scores help fill in the gaps between what people say, and how that impacts the scores they leave. We base our insight on our semantic analysis, which works across over a dozen languages. We learn, in each city and across the globe, how strongly compliments or complaints in a semantic category (management, housekeeping, WiFi, bathrooms, friendliness, etc.) tend to affect the scores that the hotel receives. Unsurprisingly, complaints about management correlate with lower scores; and compliments about the housekeeping tend to correlate with higher scores. Our model leverages all the data in all reviews, to learn for each city in the world how strong these effects are. Once we know this, we can estimate the impact that, for example, good housekeeping had on your performance score in a particular time range.
Impact Scores offer insights which may be surprising but cut to the heart of addressing customer concerns. Consider, for example, a hotel with three hundred reviewers commenting on the WiFi and three reviewers commenting on the cleanliness of the pool area. If two or three people like the WiFi, it means there are still one hundred complaints about the WiFi. People expect the WiFi to work, and they’ll give a lower score if it doesn’t; these one hundred complaints have a serious impact on your overall performance score. Even if all three customers commenting about pool cleanliness give a very low score, it won’t have as much impact on the TrustScore as the WiFi. And this is true, even though two hundred guests said the WiFi was good because positive comments about WiFi don’t tend to increase the score the reviewer leaves by a significant margin, the way complaints do. The Impact Score draws attention to the areas that have the largest potential impact on the performance score – the areas that are actually affecting how guests feel and are affecting the scores they give in their reviews.
The insight we offer through Impact Scores leverages all our review data for all hotels so that we can make sophisticated estimates of true impact. But, now that we’ve done the work for you, this insight is easy to get for your hotel, to implement for your customers, and to improve your review scores.
The impact scores are divided into Negative Impact and Positive Impact. For each category shown, you are able to see how many points your performance score was impacted by. You are also able to view complaints or compliments by clicking the option under the appropriate column. You can see details pulled from the reviews itself in the details column. Please note that details are only pulled from reviews written in your user interface language. The competitors’ column benchmarks your property´s sentiment performance to your competitors.
Get an overview of your reviews
The Reviews Tile shows you a quick picture of the positive and negative reviews your hotel has received recently. Click the tile to expand it and see individual reviews, as well as more information about the reviews listed.
You are also able to see in the “Reviews to respond” section, any review that has not been marked as responded.
When you scroll further down, you will see the category details related to the reviews. The categories are also split into Complaints and Praises. Click on a category to view the reviews where the sentiments were picked up from.
Track your management response progress
Many review sites allow you to post management responses. Click the tile to see how your responses are distributed by rating.
Your response rate is only calculated based on reviews from sites that allow responses. Please note that your public and protected reviews collected using TrustYou Stars (Guest Satisfaction Survey) are also included in the response rate.
Here’s a list of sites that allow management responses to reviews:
|
|
Note: Most review sites moderate both reviews and responses. There can be a delay between when a review or response is sent and when it appears both on the site and in TrustYou. Any review that you click respond on is marked as responded in TrustYou Monitoring, even if the text doesn’t appear yet.
Find out how popular your hotel is
The Popularity Tile pulls information from sites that provide a ranking of the most popular hotels within a city or destination. TrustYou averages these ratings to find out how your hotel ranks compared other hotels in the area.
The following sources are currently providing a city ranking:
|
|
How it’s calculated:
Assume your hotel has the following ratings:
- TripAdvisor – 41 of 184
- Qunar.com- 72 of 194
Your hotel is more popular than:
- TripAdvisor: 100% – (41 – 1) / (184 – 1) = 78.14%
- Qunar.com: 100% – (72 – 1) / (194 – 1) =63,21%
We then get an average of all these ratings, so your hotel’s popularity would be 70.30%, or within the top 30% of hotels in your market.
Manage your workflow using tasks & goals
There are a few tiles that are unique to the dashboard – they help you manage your goals, manage your tasks, and track customer sentiment.
Goals are targets for review scores that you’d like to meet, and the goals tile helps you track your progress. The Tasks Tile serves as a way to remind yourself to follow up with a customer, run a report, send an email to a colleague, assign work to someone else, or anything else you can think of.
Organize & track your target metrics with the Goals Tile
The Goals Tile helps you keep track of improvements in customer sentiment and response rate over time for your hotel. When you expand the tile, you’ll see all goals for the hotel that you’re currently viewing on the dashboard, even those assigned to other people in your user group.
Here’s how to create a goal for yourself or one of your team members:
- Click the Goals tile to expand it.
- Click New Goal.
- Enter a name (this can be anything you want), assignee, and due date for your goal.
- Fill in the other fields with information for the goal (we’ll talk more about the individual fields below). Each field you fill out will create a separate goal for your assignee.
- Click Save.
There are quite a few ways to create goals, so here’s an overview of what each field means so that you can customize goals to your specific needs:
- Hotel / Group: This shows the hotel that the goal will be assigned to. This field isn’t editable.
- Source: This will determine where the data for this goal comes from – you can pick any individual review source or select overall to take reviews from all sources.
- KPI Section:
- Overall Score: This is filtered by the source you select in the Source field.
- Performance Score: This is filtered by the source you select in the Source field.
- Review Count: This is the total number of reviews that TrustYou can see from the review source selected in the Source field
- Positive Reviews (%): This is the percentage of reviews that are positive for your hotel. This is filtered by what you select in the Source field.
- Popularity: This is your ranking against other hotels in your area. A popularity score of 98% means that you are more popular than 98% of the hotels in your area. This is filtered by what you select in the Source field.
- Sentiment Score: Sentiment score is an average of the positive phrases in each review. We’ll talk more about managing sentiment scores in the Sentiment Tile section of this guide.
- Sentiment Performance:: This filter allows you to zero in on certain areas of your hotel’s performance (customer service, atmosphere, etc.). This only affects the Sentiment Score metric. This is filtered by what you select in the Source field.
- Response Coverage Section – this is filtered by what you select in the Source field.
- Overall: This is the overall response rate (reviews responded to/total reviews) for the Timeframe selected.
- 5 Star: This is the response rate on 5-star reviews (between 81 to 100 out of 100) for the Timeframe selected.
- 4 Star: This is the response rate on 4-star reviews(between 61 to 80 out of 100) for the Timeframe selected.
- 3 Star: This is the response rate on 3-star reviews (between 41 to 60 out of 100) for the Timeframe selected.
- 2 Star: This is the response rate on 2-star reviews (between 21 to 40 out of 100) for the Timeframe selected.
- 1 Star: This is the response rate on 1-star reviews (between 0 to 20 out of 100) for the Timeframe selected.
Goal Status
Open goal: all goals which have a due date in the future, no matter if they are currently achieved or not.
Achieved goals: all goals which have a due date in the past and have a percentage of achievement of 100% or greater.
Not achieved goals: all goals which have a due date in the past and have a percentage of achievement lower than 100%.
You can click a goal in the list to view more details for that goal or delete it.
Set reminders and assign tasks with the Tasks Tile
The tasks tile will always show you all tasks that you’re involved with. You can assign tasks and goals to anyone in your user group – if there’s someone missing from your group, contact us at service@trustyou.com and we’ll make sure to get your team set up (please note there is a maximum number of users each hotel can have).
You can create tasks directly from the tasks tile or while viewing reviews. You can create a task for anything – it’s not just limited to TrustYou and reviews – you can use the Tasks Tile as a way to keep yourself organized while providing excellent guest services.
Click any task in the list to view more details about it. Once you’ve finished working on a task, click Close Task to resolve it. If you no longer wish to see a task in the list, delete it by clicking Delete.
Here’s how to create a task while viewing a review:
- If you’re in the Reviews tab, click Add Task. If you’re viewing the review from another tab, click the gear icon, then Add Task.
- Enter a name for the task, assignee, and description.
- Click Save.
- The review, a link to respond, and a link to the review on it’s website will be included in the task details.
Here’s how to create a task from the tasks tile:
- Click the Tasks tile to expand it.
- Click Add Task.
- Enter a name for the task, assignee, and description.
- Click Save.
Find out how your guests feel with the Sentiment Tile
The Sentiment Tile includes two sections; Categories and Meta-Review.
Categories
The Categories tab will show you the performance score of each category as well as the amount of positive, neutral and negative comments for each category. You can click on the arrow on the left-hand side of any category to view the subcategories available.
A trend is also included in the table to let you know if the performance score has increased, decreased or stayed the same within the selected period of time.
At the bottom of the table, you will notice a word cloud with positive, neutral and negative sentiments. Click a comment to see the reviews that match that sentiment.
You can filter the word cloud by selecting or de-selecting the checkboxes on the left-hand side of the categories in the table. The filter also applies to the subcategories.
There are additional filters at the top of the table for the word cloud, allowing you to filter for all, none, categories, subcategories, positive, neutral or negative. You can also click on Reset word cloud to go back to the default settings.
Meta-Review
The Meta-Review widget provides a number of key data points, indicating a hotels performance on both overall and context-specific levels. Numeric values such as the “TrustScore” and “ranking” provide a general outline of the hotels’ performance, and also a hotels performance within its city, respectively. The “Good to know” section highlights, concisely, what guests consider to be the most relevant positive/negative points about a hotel, along with some “highlight” snippets which are most frequently mentioned by the guests. The review summary ( the main bulk of the text) contains the most mentioned / most relevant sentiments for a hotel (such as room/pool/food etc), indicating numerical scores for each of these and providing textual data reflecting the reviews from which we sourced the information. For the above information, filters can be applied to alter the display to result in a more context/user specific outcome. For instance, when the “business traveler”, traveler type filter is selected, the review summary display and good to know will reflect the view of the business travelers who reviewed this hotel, by only taking into account the reviews ´submitted by these specific guests. In the same sense, the user can filter to see what people writing in a particular language, e.g. French, wrote about a hotel by using the language filters.
Get a quick overview of your social media stats
The Social Tab shows key data and recent social media posts from Twitter, Klout, Facebook, Foursquare, and Weibo. Click the gear next to a social media post to see more options (like Respond, Retweet, etc.)
Compare your hotel to specific hotels
The CompIndex Tile shows you how your Overall Score compares to the average of your competitors.
This index shows you how well your hotel or brand is performing for a KPI compared to your competitive set. A CompIndex of 1.05 means that you are 5% better than your competitive set average, and an index of 0.96 means that your performance is 4% behind your competitive set average. The color thresholds are as follows:
< 1 = red (you can do better)
1 = black (neutral)
> 1 = green (you are ahead of your competitive set)
If you don’t have competitors set up yet, please contact us at service@trustyou.com so that we can add them for you. Click the tile to see more details about how your competitors are performing.
Highlights Tile
The Highlights Tile displays the most important information for the hotel selected on your Dashboard in relation to the Key Performance Indicators in the application based on the time period selected.
Top Sources:
This provides you with the top 5 sources for the hotel selected on your Dashboard where the most content is coming from.
For the Overall (TrustYou) data point, all sources are considered and not only the 5 Top sources.
Performance chart:
This shows the performance during the chosen period. It also shows the positive and negative reviews for this period with a percentage split shown in the legend. The black line represents the change in performance over the selected period.
Competitors:
This section includes the main KPIs for the chosen hotel. It also includes the competitor average and CompIndex. The KPIs include the Overall Score, Performance, New Reviews, New Responses and Response Rate.
Best rated/Worst rated:
This section shows the top 3 best and worst sentiment categories for the selected hotel (ordered by performance). When the performance score of more than 1 of the categories in the top position is the same, then those categories are ranked by the number of total mentions.
Please note that you would need a minimum of 5 mentions for a category to show up in the best and worst rated section.
Note: When exporting the Highlights Tile as a PDF report, all the data is presented to you on one page.
See statistics from specific review sites with Source Tiles
Each available review site has a tile that you can add to the dashboard. The tile will show you your average rating on this review site.
When you click to expand a Source Tile, you’ll see tiles similar to the ones we’ve already mentioned for Comparison, Performance, Reviews, Responses, and Popularity. These tiles work the same as the other tiles on the Dashboard, but the data is filtered so that it only considers reviews from the specific review site.
Within the Holidaycheck tile, you are able to view the recommendation rate for your hotel. There is a chart available to track this statistic over time.
Department Sentiment tiles
We’ve created 4 departments in our tool based on what is commonly found in a hotel: Housekeeping, Front Office, F&B and Spa. Each of them has a list of semantic categories associated with them which you can see when you click on the tile.
The departments also have a performance score based on the matches for their categories.
Additionally, the departments are available in:
Portfolio & Comparison tabs, as a category under the Sentiment performance column.
Review inbox, as a category in the filter and also when editing the sentiment of a review.
Language Distribution Tile
This tile shows you the Distribution per Language. In addition to that, you can see your Performance Score as well as the Response Rate. If no language was detected, we categorize it as ‘No language detected’.
Reviews
Reviews Inbox
The TrustYou Reviews Inbox allows you to more easily manage your workflow and analyze guest reviews. Here’s an overview of how it works:
- Your filters (or folders for email inboxes) are listed on the left side
- A list of all reviews that match your filters are in the middle
- Click a review to select it and the review will expand and show you the full details on the right side.
- There are many options available to work with a review in the inbox.
When using the Inbox, you will see the number of reviews based on certain filters selected.
Number of filtered vs total:
Filtered: all reviews based on all filters
Total: all reviews based on selected period and hotels
Please note that survey unpublished reviews are not taken into account.
Also note that user specific filters cannot be computed (open tasks, open action alerts and review status such as unread).
In case one of the uncomputable filters is selected, the wording will change to e.g. “1-10 of up to 45 reviews”.
Based on how you interact with your reviews and how you manage your inbox , a review can be in one or more of the following states:
| Status | Icon | Old icon |
|---|---|---|
| Responded | |
|
| Marked as responded | |
|
| Marked as unresponded | (removed) | |
| Unpublished | |
|
| Has alert | |
|
| Has task | |
|
| Flagged as inappropriate | |
Filters
Each filter uses different data points, and can help you see different information. Here’s an overview of what each filter can help you with:
Status
The Status Filter helps you view only the reviews that are unread, unresponded or responded. If you’d like to remove this filter, click all. An unread review will be in bold font in the list of reviews, unresponded reviews are reviews that have not been responded to yet or marked unresponded, and responded reviews are reviews that have been marked as responded or we have picked up the management response from the portal.
Here’s a list of sites that allow management responses to reviews:
|
|
Groups & Hotels
The Groups & Hotels Filter lets you choose reviews from your hotel or any hotel in your comparison set. This can come in handy if you’d like to see specific review information for other hotels in your area.
For Enterprise users, you are able to select any hotel in our database. If you cannot find a hotel you are looking for, please send us an email at service@trustyou.com with the hotel name and address.
Timeframes
The Timeframes Filter helps you to see reviews from a specific time range. You can select any of our predefined time ranges, or choose a specific range of dates with From… To…
Please note that any ranges with “Previous” refer only to the last complete time range. For example, Previous 3 Months will show the last 3 complete months of data.
Scores
The Scores Filter allows you to only view reviews with certain scores. Click and drag the sliders to select the range of scores that you’d like to see.
Language
The Language Filter allows you to filter the reviews that appear by language. You might find this useful if you’d like to use a native speaker to respond to reviews on review sites.
Tasks & Action Alert status
The Tasks Filter will help you see the reviews that have tasks associated with them.
The Action Alerts Filter will allow you to see TrustYou Survey reviews that have alerts which are open, closed or overdue. You can also see reviews without an alert.
Sentiment
The Sentiment Filter helps you to filter your reviews using our sentiment analysis. You can filter reviews to see those that have negative, positive, and/or neutral sentiment & also filter to only see reviews for specific components of your guests’ stay (like room, service, food, etc.).
Sources
The Sources Filter allows you to view reviews from a specific set of review sites.
You might use this filter to only see reviews from sites that allow responses, or see reviews from sites that are particularly important to you.
TrustYou Survey filters
You are able to filter by specific TrustYou Survey data points, when Trustyou Survey is selected as a sources in the Sources Filter.
The following filters are available:
- Survey Type
- Net promoter score
- Nationality of traveler
- Type of traveler
- Guest Information (first name, last name, check-in date, check-out date, email address, extended pms data)
Extended pms data are additional fields you decided to include in your guest data upload. For more information on the configuration of these fields, please send us an email at service@trustyou.com.
Note: When viewing reviews with TrustYou Survey as the source, you can select to hide unanswered question when you open up the review in its entirety.
Review Export
You have the possibility to schedule review reports from the inbox. You can select the filters in the inbox and schedule a report on a daily/weekly/monthly basis and receive the report either in Excel or PDF. Please note that the PDF report is restricted to the last 10 reviews.
Look for the export icon in the Inbox to access the functionality to export the reviews to flex reports. You can select individual reviews and download them immediately as an Excel or PDF document. This option also makes it possible to print reviews. The Inbox will be considered one more module that can be added in the Reports side panel, which means it can be combined with any other modules such as Overall Score tile or any specific survey module.
Responses
Click Respond to reply to reviews. Many sites allow for management responses. Each site that allows management responses requires that you have a business/management account to respond to reviews. Please contact the review site directly for help setting up this kind of account, as the TrustYou team is unable to facilitate this. A complete list of sites that allow management responses can be found above. Please note that your public and protected reviews collected using TrustYou Stars (Guest Satisfaction Survey) are also included in the response rate.
Managing Response Templates
You are able to respond to reviews using our Management Response Templates. Before you start responding to reviews, be sure to set up and customize the response templates in the settings section of the tool. Once in the settings, scroll down to the Set up your response templates section at the bottom of the page.
There are 3 default templates provided for you. One for positive, neutral and negative reviews each. You have the ability to clone any of the templates and then edit them later. Once you are done, you can also delete the cloned templates if you no longer utilize them.
If you want to create a brand new template for yourself, click on + Create new template. Be sure to edit all fields according to how you would like to use the template. You can decide if you would like to keep the template as private or share it with other users within your user group.
Please note that if you select to add additional languages for your custom template, you would have to include the response in that language yourself. Once done customizing your template, click on save and it will be added to your available templates.
Using Response Templates
The templates will be automatically used anywhere in the tool that you have the respond with template button. You can click on the respond with template button and the template will appear for you to use. You have the ability to select the language and the template is automatically set for the corresponding sentiment, i.e. if the review fits in the positive, neutral or negative category. You can edit any of the information within the template before copying and going directly to that review. If you don’t want to use the default templates or your customized template for a particular review, you can click on No template in the drop down options. If you click on Copy and reply, it will automatically copy the information into your clipboard and take you to the source portal where the review is posted.
Once you go back to the TrustYou site, you will notice a confirmation message at the top of the open template asking you to confirm if you have indeed posted a response or not. If you were not able to submit the response, please click no and the review will not be marked as responded. If you click yes, the review is marked as responded and this will be reflected when selecting a filter. Remember you can also click on go directly to the partner website at the top of the template if you would like to be directed to the review portal without working with the templates.
When viewing a Tripadvisor review and you click respond, the Tripadvisor Management Center opens as an iframe directly in the tool. You are able to respond to Tripadvisor reviews without a new tab opening within your browser.
If you are using the guest satisfaction survey, you can use the templates by using the respond button in the survey tab. Responses in the survey tab would be sent as an email to the guest. Hence, you may want to keep the same email subject or adjust it yourself and also include your email address in the appropriate field. You have the option to edit the response you want to send and also decide if you would like to include the review text at the end of your email.
Private & public responses for survey reviews
Gives the possibility to add responses:
Privately sent to the guest via email
Publicly via our widgets
Within the response template you have the option “Send a response to the guest via email”. If this box is selected, then the guest will receive the response, if it is unselected, it will only be added to the widget where the review is located.
You also have the option to send the guest a different email than what is shown in the widget by selecting “Write a different response to the guest”
Edit review sentiment
Here at TrustYou we are confident that we have the best sentiment analysis technology in the travel industry; however, no computer program will ever be able to understand texts like a human. Use this interface to correct recognized opinions in your reviews.
In the Reviews Tab, select a review and click on “More” on the right side of the review to see the Edit Sentiment option.
Insert a New Opinion
Press down your mouse button on the first word of the expressed opinion in the sentence, drag it over to the last word, and let go of the mouse. A dialog will appear where you can edit this opinion’s sentiment and categories.
Edit/Remove an Opinion
Simply click on an opinion to see the same match dialog again. You may delete the opinion from this dialog as well. Note that an opinion needs to have at least one category such as ‘Room’, ‘Service’ …
Saving your Changes
Use the Save button in the editor to save your changes. Note that all changes are reviewed by the TrustYou team. Any wrong or malicious changes will be reverted by us.
Please note it takes 24 hours for the changes to show up in your account.
All sentiment changes will be reviewed and we are monitoring editing behaviour and doing regular checks in order to prevent misuse of this functionality.
Comparison
Get to know the Comparison Tab
The Comparison Tab helps you to benchmark the performance of your hotel versus its competitors.
The Comparison Tab provides you with two options to view data. The visual view displays a graph that you can use to observe relationships between hotels. The table view lists important statistics for your hotel’s competitive group.
Edit comparison group
In order to ensure that your comparison group has the best data available, the TrustYou Success Team will help you set up your comparison group. If you need a new group added, or any changes made, just let us know at service@trustyou.com.
Users with the account type Administrator, can edit their competitive sets and change their hotel’s competitors whenever they want. The number of competitors allowed is limited to the number allocated on your hotel´s TrustYou license.
Here’s how to create a new comparison group:
- Click Add competitors
- Enter the name you’d like for this group
- The name of your hotel should appear at the top left side of the new window under Your hotel.
- To add competitor hotels, type their hotel name into the right search box. Repeat until you’ve added all the hotels you’d like to this group. This split is necessary to calculate the CompIndex for your own hotels.*
- If a competitor hotel cannot be found you will find a link in the window which you can click on to notify us to add it to the system for you. Additionally, you can contact us directly at service@trustyou.com.*
- Click Save
*Note: If you have trouble finding a hotel in this list, consider omitting common words in hotel names like the, of, by, hotel, etc. If you still have trouble finding the hotel, feel free to contact us at service@trustyou.com, and we’ll help locate and add the hotel to the group for you.
You can also edit competitor groups by clicking the pencil icon next to the competitive group name in the tab ‘Comparison’.
Get insight into your competitor group’s overall performance with the visual view
The visual graph is customizable so that you can receive insight about your hotel group’s performance. A colored circle on the graph represents each hotel. The larger a circle is, the more reviews there are for that hotel.
To view different information and statistics, click Configure above the graph. Here’s how the graph can be configured:
- For the vertical and horizontal axes, you can choose Response Rate, Performance, or Overall (Trust) Score.
- The Source option lets you filter the data by review site. If you choose TrustYou, you will see all data.
- The Timeframe option allows you to filter the data by a time range.
Once you’re done making changes to the graph, click Save to
Get an overview of important statistics with the table view
The table view shows your comparison group along with key performance metrics. You can change the statistics you are viewing by using the filters above the table. The filters are also available for you to use when you click on a tile at the bottom of the table. When you select the filter Values & sources, you are able to select if you would like to see information from all sources – Overall (TrustYou) – or choose from the sources listed. You can then select which values you would like to view on the table or tick the option Select all.
When you go into the Advanced settings, you are able to define each column that appears on the table. Firstly you need to select which value you would like to see, choose if you would like to use the selected timeframe in the filter, or choose a specific timeframe that would relate solely to that column.
Certain statistics are only available when you use the advanced settings. You are able to use the checkbox Show Trend in the advanced settings to differentiate between trends and absolute values. It is available for the Overall Score, Popularity and Recommendation rate.
You can also select to show a Benchmark timeframe. It is available for any of the data points you would like to see the year over year or trending change for. When you check the box, you have three options. You can compare the selected value with the previous period, same period 1 year before or same period 2 years before. By using the benchmark timeframe, you end up with three columns:
- The 1st column shows the selected value
- The 2nd column shows an older value which can be the previous period, same period 1 year before or same period 2 years before.
- The 3rd column shows the change between the 2 other columns and can be either a percentage or an absolute value depending on the column type.
There are the 2 formulas we use to compute the 3rd column:
- First formula: (column 1 – column 2) / column 2 -> this is a percentage
- Second formula: column 1 – column 2 -> this is the difference
Change what time period you see data for by clicking the time filter. Remember to click update after you have made any changes. By clicking Reset filter, you can restore the filters to the default settings.
The Timeframes Filter helps you to see reviews from a specific time range. You can select any of our predefined time ranges, or choose a specific range of dates with From… To…
Please note that any ranges with “Previous” refer only to the last complete time range. For example, Previous 3 Months will show the last 3 complete months of data.
View tiles on your Comparison Tab
The CompIndex is displayed on each tile. This index shows you how well your hotel is performing for a KPI versus the competitive set. A CompIndex of 1.05 means that you are 5% better than your comp set while an index of 0.96 states that your performance is 4% behind your competitors. The color thresholds are as follows:
< 1 = red (you can do better)
1 = black (neutral)
> 1 = green (you are ahead of your comp set)
The table in each tile can be customized by clicking the Edit button in the top right corner.
Overall Score
Your Overall Score uses TrustYou’s special algorithm to score your hotel. The most recent reviews are given more weight than older reviews to calculate this score. The past 24 months of review data are used when calculating the Overall Score. When you click the tile to expand it, you can see the score, reviews collected and response rate for each hotel in the group you’ve selected.
Performance
The Performance tile shows the performance score of your hotels over time – which is an average of your hotel’s ratings over the time period you select, e.g. last 30 days. Unlike your Overall Score, newer reviews aren’t given any more weight in this calculation – it’s a simple average.
For example, the performance score is an average of all ratings received in May—68 of 100 (or 3.4 of 5). Click on expand the view which hotels collected the best review scores lately.
Responses
Many sources (review sites) offer you the ability to respond to guest comments publicly. We summarize the statistics how active your hotels are in responding with this tile. Your response rate is only calculated based upon reviews from sites that allow responses.
We’ve posted a list of the sites that you can post management responses to in the reviews section. Please note that your public and protected reviews collected using TrustYou Stars (Guest Satisfaction Survey) are also included in the response rate.
Note: Most review sites moderate both reviews and responses & there can be a delay between when a review or response is sent and when it appears both on the site and in TrustYou. Any review that you/the hotel click/s respond on is marked as responded in TrustYou Monitoring, even if the text doesn’t appear yet.
Popularity
The Popularity Tile pulls information from sites that provide a ranking of the most popular hotels within a city or destination. TrustYou averages these ratings to find out how your hotel ranks amongst other hotels in the area.
How it’s calculated:
Assume your hotel has the following ratings:
- TripAdvisor – 41 of 184
- Qunar.com- 72 of 194
Your hotel is more popular than:
- TripAdvisor: 100% – (41 – 1) / (184 – 1) = 78.14%
- Qunar.com: 100% – (72 – 1) / (194 – 1) =63,21%
We then get an average of all these ratings, so your hotel’s popularity would be 70.30%. You can also say that it is within the top 30% of all hotels in the city. We’ve posted a list of the sites that have a city/popularity ranking in the dashboard section.
Reviews
The Reviews Tile shows you a count of all reviews, broken down by star rating, as well as an average for all hotels in the hotel group you have selected.
Sentiment Scores, TripAdvisor Details & Social
These tiles show a quick overview of the currently selected hotel group’s statistics across these areas. We’ve preset these tables with the most commonly tracked items, but you can always change what’s displayed by clicking the Edit button above the table.
Create new tiles
Not finding the data you would like to see? Here’s how to add a custom tile to your comparison tab:
- Click Add Tiles below the visual/table view section of the comparison tab.
- Select Custom Tile
- Click Save and the setup panel to customize the tile will appear automatically.
- Click on the name of the tile to change it.
- Select the sources you would like to see data for. Per default the source Overall (TrustYou) is selected. Click on Toggle source selection to choose different channels.
- You can select the data points and timeframes you would like to view for this channel now. Click Add Column to create an additional column in the table.
- Click Save and your custom tile is created.
Graph Tile
With these tiles you’ll be able to plot graphs for your benchmarks together with a table similar to the one we show in the Custom tiles, which can be hidden if you just want to see the graph. There are 4 different supported graph types:
Bar chart: will show a bar for each hotel in the group to compare them for 1 specific KPI.
Bubble chart: will show a bubble for each hotel in the group for 3 specific KPIs (represented as the x-axis, y-axis and the size of the bubble) to see relationships between variables.
Pie chart: will show a pie chart where each slice represents the data for a hotel and 1 specific KPI.
Timeline chart: each line will represent how a hotel is performing over time for 1 specific KPI, the data will be shown using an automatic time stepping based on the global timeframe.
Here is how to add a new Graph Tile:
- Click on the Add Tiles option and select to add a Graph Tile
- Click Save
- Name your tile at the top left and select which graph type, values and sources you wish to see
- Click on Apply Changes
The following tiles are included as default tiles for all new users:
Performance Trend: showing a line chart with group data for the Performance score.
Best Performers: with a bar chart showing data for the group and the hotels with the best Performance score.
Worst Performers: the same as the previous one but showing the worst hotels for that KPI.
Please note that the default graphs tiles cannot be found in the add tiles settings once deleted. Hence, please be aware of the settings in the graphs in case you want to add them back.
Performance Trend:
Graph Type – Line
Sources – Overall
Value – Performance
Best Performers:
Graph Type – Bar
Sources – Overall
Value – Performance
Performance Column – descending order
Worst Performers:
Graph Type – Bar
Sources – Overall
Value – Performance
Performance Column – ascending order
Survey
Request feedback from your guests
The Survey Tab of TrustYou lets you solicit feedback from your guests. Millions of travelers begin their hotel search on Google, where TrustYou’s Meta-Reviews and TrustScores are incorporated. TrustYou Stars allows you to push reviews into Google. Research shows that as you gain more reviews, your TrustScore and Meta-Reviews improve.
The steps outlined below will take you through the setup of the survey. If you have questions or need support, we recommend joining our regular TrustYou Survey webinars. You can see all upcoming sessions on our website trustyou.com/events/calendar and register for them.
Create a Survey
If you would like to setup your survey, please access the Survey Tab in the application. If do not see your Survey Tab, please contact us at service@trustyou.com so that we can set up your Survey tab for you. After we’ve created the survey tab for you, you’ll be able to build and edit surveys.
- Click the Survey Tab
- Click + to add a survey next to the appropriate hotel name.
- Use the new window to build your survey questions. We’ll talk more about each tab in the customize your survey section below.
- Click Save changes
Note: When using a template you can select to have custom questions appear in the segmentation filter if the answer type is a Score, NPS, Drop-down Menu, Radio-buttons or Check boxes.
Customize your survey (Survey Settings)
You can use TrustYou Stars to ask guests anything you like. Click the Survey settings icon next to a survey to access options to change the content and colors of your survey. To see additional settings as described below, click on the “Advanced” button at the top of the survey settings.
General
Survey name – Choose the name you would like to give your survey. This is for internal purposes only and is mostly relevant for those using multiple surveys.
Type – Select which type of survey you would like to create by selecting either to have a Post-Stay or On-Site Survey. This is for internal purposes when using the filters.
Privacy level – Choose privacy level for your collected reviews. Public reviews influence your Analytics KPIs, and contribute to you Meta-Review and TrustScore. Protected reviews will still influence your Analytics KPIs, but not your Meta-Review nor TrustScore, plus they are hidden from competitors. Private reviews are only visible in the Survey tab.
Rating Scale – Adjust the scale in your surveys. Choose from either a 5-point scale or a 10-point scale.
Default language – This is default language for welcome texts and custom questions that will be used when no translation for guest specific language is available.
Limit displayed languages – Limit list of languages available in survey page only to translations provided for welcome texts and custom questions.
Pagination – Select if you would like to limit the number of questions that appear on each page.
Note: Once your survey has been created and you click on the survey settings, you will find the public link to your survey as well as the QR code.
Pre-Stay Survey
When the survey type “Pre-Stay” is selected, several options in the settings are hidden such as Privacy, Google Push, several basic questions and all category questions.
Messages
Welcome message – This text will be shown at the top of the review page to welcome your visitor and explain the purpose of the survey. Add additional texts in other languages if you expect international visitors. The default text will be shown for all visitors whose language is not covered here.
Thank You message – This text will be shown after the survey has been completed and is submitted to indicate the visitor that the survey has been successfully submitted. Add additional texts in other languages if you expect international visitors. The default text will be shown for all visitors whose language is not covered here.
To make it easier for you to translate these messages you can view the original text by checking the box after the translation menu.
Rate a hotel from the post-stay email
For those users using our TrustYou default mailing templates, we’ve included the option to replace the questionnaire link with an actual question in the emails sent to guests.
This can be done by going to Mailing settings, then Messages and selecting the checkbox “Allow guests to rate your hotel directly from their email inbox”.
When this setting is activated, a rating component will be displayed and will allow guests to give an answer from 1-5 or 1-10 depending on the survey setting and when one of the values is selected, the questionnaire will open in a new window with that value preselected.
Questions
Standard Questions – We’ve added some questions to our survey builder that most of our clients ask their guests. Feel free to use as many or as few of these as you like. If a question is highlighted, it will be included on the survey page. Click a question to toggle questions on & off. Overall score, custom questions, and detailed ratings cannot be turned off from the list of general questions. Overall score has to be included on all surveys in order to help calculate your guest survey score.
Detailed Ratings – This will allow you to ask your guests about specific parts of their stay. Just like the general questions, only questions that are highlighted will be included here. Click an item to toggle it on and off.
Custom questions will not appear if you do not create them yourself in the custom questions section (available as an advanced feature).
You can reorder questions by using the “Move question” option on the right of a particular question.
Custom Questions
You can ask your guests anything you’d like with custom questions. Add questions right away or group them into different sections.
Here’s how to add custom sections to your survey:
- Click on Add section to add a custom section.
- Select the language of entry and insert the section name.
- Toggle to other languages and insert the appropriate section name.
- Click on Save changes to complete entry.
- You can use the Move Section option to change the order of the section.
Here’s how to add custom questions to your survey:
- Click on Add new question.
- Select the language for the question.
- Insert the question text.
- Choose an answer type.
- Select if the question should be mandatory.
- Select if the question should have a parent question.
- Repeat from step 2 to add additional languages.
- Click Add question once done.
You can always edit and move questions around once they have been setup.
If you are using a template and have questions that are not preselected, you can add those questions by clicking on Add question from template.
The available answer types are:
- Short text – good for names, email addresses, address fields, etc.
- Long text – good for written open-ended answers
- Number – like short text, but will only accept digits: good for dates, phone numbers, etc.
- Score – a scale from 1-5 or 1-10, with 5 and 10 being the best: good for “how would you rate…”
- Dropdown – a menu with a list of options to choose from, only one can be picked
- Checkboxes – a list of options to choose from, many can be picked
- Radio Button – a list of options to choose from, only one can be picked
- Message – Choose to display a message in the survey, which does not require an answer
- NPS – Use this answer type to generate a Net Promoter Score that can be used to gauge the loyalty of your property or brand´s customer relationships
- Date – When having such a question in the questionnaires, an additional calendar will be shown next to the field so that guests can choose the date from that component. In the Analytics tool, the dates will show up in ISO format as yyyy-mm-dd.
It is possible to have surveys with no mandatory overall score and email address.
Making the email address not mandatory:
- In the General settings of the survey the check box “Make the email address field mandatory for submitting reviews.” will always be selected.
- Uncheck this box to make the email address not mandatory.
Making the Overall Score not Mandatory:
- In the “Basic Questions” settings of the survey, you can select to make the Overall Score not mandatory.
When a review is submitted without a score, that review will be processed and published as any other review would. On the other hand, if it doesn’t have a guest email address, the review will:
- Not be published.
- Not influence any KPIs in the tool, except the ones shown in the Survey tab.
- Not be shown in any public widgets.
What will happen to statistics when the Overall Score is not given:
- Overall Score columns will not take empty scores into account to calculate the average.
- Top Score columns will not take empty scores into account to calculate the average.
Net Promoter Score (NPS) question type for custom questions
You have the possibility to choose NPS as a data type for custom question in your survey.
Selecting NPS as a data type for a custom question will have following results:
NPS specific radio buttons will be presented in the survey questionnaire and the NPS value will be displayed in the survey overview table. The NPS value will also be displayed within the custom questions tile and reports.
Mandatory questions
Both general questions (except “detailed ratings” questions) and custom questions can be marked as mandatory. If selected, those fields will be verified to make sure they have correct values and are not empty when filling the questionnaire.
Hotel Details
Custom name – Enter the name you would like to appear on your survey. This will appear in the header part of your survey.
Custom address – Input the address you would like to appear with the format you want. This will appear in the header part of your survey.
Website – Put in your hotel´s website if you would like it shown in the survey. This will appear in the header part of your survey.
Sharing – Allow your guests to share their reviews after they submit the survey.
Facebook & Twitter– Checking these boxes will display the appropriate social network buttons above the header of your survey. These will only work if you also fill in the appropriate text fields for each of them.
Look & Feel
The settings available in the “Look & Feel” section allows you to customize the survey questionnaire so that it matches your hotel brand as best as possible. This includes the ability to change colors, fonts, question alignment as well as imagery for the questionnaire header. In the following sections we will walk you through these settings and how you can customize them to create a personalized questionnaire design.
Fonts
You can customize how texts look in your questionnaire with the three available font settings. Each of these affects different texts in your questionnaire and can be changed to a custom value by using the dropdown menu which you can open by clicking on the current font value. Here you will see a sample of the font accompanied by the actual font name underneath. We display the font sample as a pangram so that you are able to choose a font that best matches your language requirements. Please be aware that some custom fonts might not have good support for Asian languages, alphabets such as Cyrillic and even special characters (e.g. accents, umlauts).
All of the fonts we provide are made available via Google Fonts and due to technical limitations it is possible that custom fonts might not work properly in some regions of the world, such as China. Relying on Google Fonts however also means that if your hotel already uses a specific font from there, you can look it up using the search field at the top of each dropdown menu.
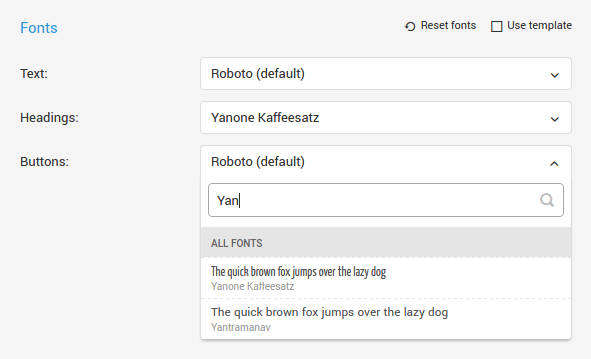
As with other sections of the survey settings, you can reset all font values to their defaults by pressing on the “Reset fonts” option or even make your survey inherit these settings from its parent template—if your survey uses one—by clicking on the “Use template” option. Next you will find a breakdown of the three different types of fonts that you can change in your questionnaire:
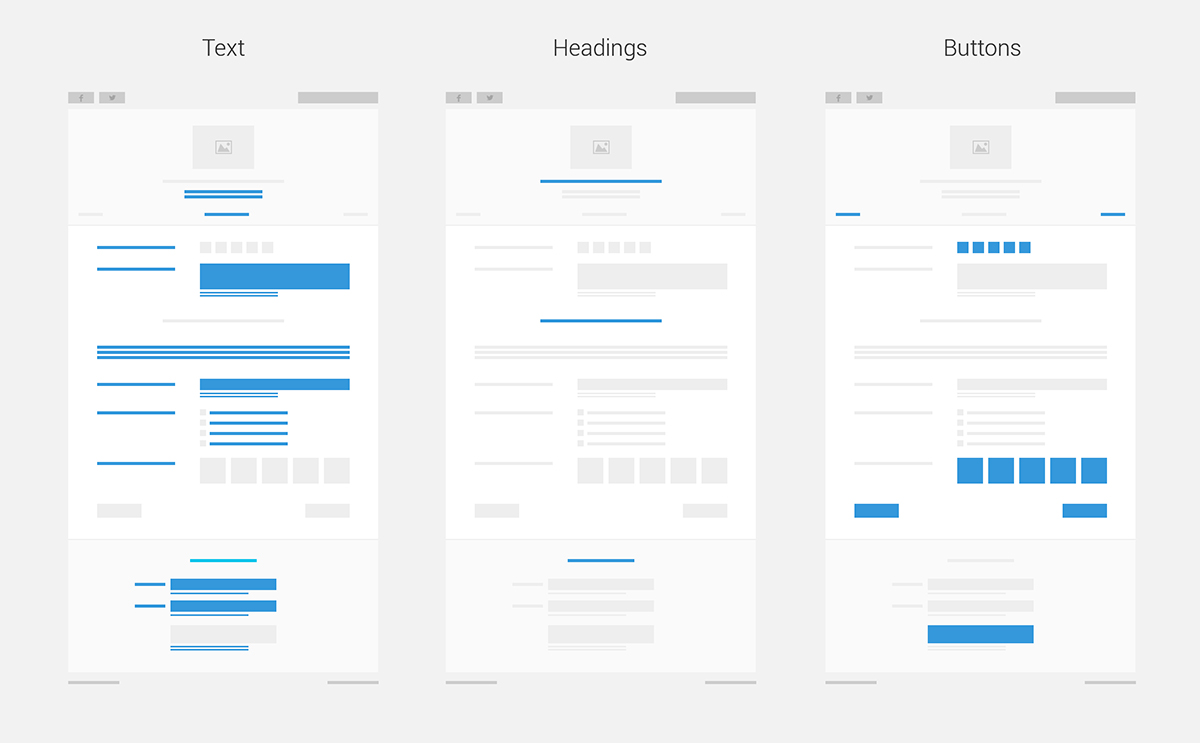
Text
Changes the font used for generic texts such as:
- Questions
- Answers: radio, checkbox, short text, long text, number, dropdown, date or message
- Contact details for your hotel, shown in the header
- Help texts shown under some input fields
Headings
Changes the font used for headings such as:
- Name of hotel in the header when using a header image type other than banner
- Section titles
- Title of the submit section at the end of the questionnaire
Buttons
Changes the font used for buttons such as:
- Pagination at both the top and bottom of the questionnaire
- Multiple choice (e.g. traveler type, hotel recommendation)
- Rating score and NPS
- Submit button at the end of the questionnaire
Colors
Because color plays such a key role in branding we provide you with the means to customize your questionnaire to match the hotel’s brand. By default the questionnaire uses a very light and clean color scheme that focuses on content. For this reason we advise you to use subtle colors that play well together and don’t draw focus away from the questions you want to address your guests.
As with other sections of the survey settings, you can reset all color values to their default setting by pressing on the “Reset colors” option or even make your survey inherit these settings from its parent template—if your survey uses one—by clicking on the “Use template” option. Next you will find a breakdown of the different types of elements for which colors can be changed.
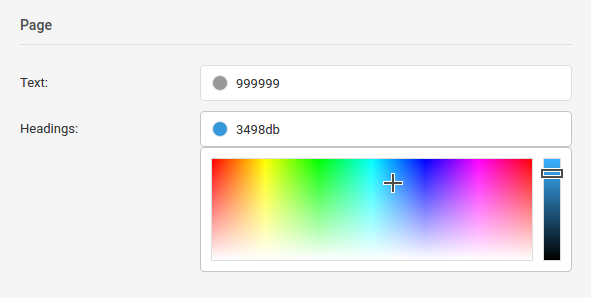
Page
Changes the colors for generic page elements such as:
- Text: questions, messages, contact details shown in the header
- Headings: name of hotel shown in the header,, section titles, title of the submit section at the end of the questionnaire
- Background: outer area of the questionnaire which will also cause the TrustYou attribution logo at the bottom to automatically change color for optimal contrast
- Foreground: inner area of the questionnaire where all the content is found. It’s important that you choose a color which has good contrast with the “Text” color as well as with the “Button” colors described below.
- Progress bar: located under the header and indicating the user’s progress when your survey has pagination enabled
Button
Changes the colors for buttons such as pagination and multiple choice (e.g. traveler type, hotel recommendation). It’s important to note that for the hotel recommendation question the icons displayed will always be colored in green (for answer “Yes”) and red (for answer “No”) so if you have this question in your questionnaire make sure to choose a button background color that does not compromise readability.
Submit button
Changes the colors of the button found in the submit section at the end of your questionnaire. Users will click this button to submit their answer so make sure that it is prominent enough to spot on the page but also that it has good contrast between text and background so as to be readable enough.
Rating button
Changes the colors of rating buttons such as score or NPS. The background colors for this button type can be customized for each of the sentiment thresholds (i.e. negative, neutral, positive). By default these colors will range from red (low score), orange (average score) and green (high score) when your guest selects a score, so make sure that the custom colors you select also reflect the score value.
Input field
Changes the colors of input fields such as short text, long text, number, dropdown or date. Apart from the actual fields themselves, you can also set the color of the help text that is sometimes displayed underneath the text field.
Layout
Although the questionnaire uses a standard layout optimized for browser compatibility there are a few settings which you can still change to make it better suited to your content. As with other sections of the survey settings, you can also have your survey inherit the layout settings from its parent template—if the survey uses one—by clicking on the “Use template” option.
Question position
By default questions are positioned on top of answers on any screen size. This improves readability as well as allows for longer questions to fit on a single line of text. On the other hand this can also increase the overall height of your questionnaire, which means that an ideal layout will always depend on what questions are being used.
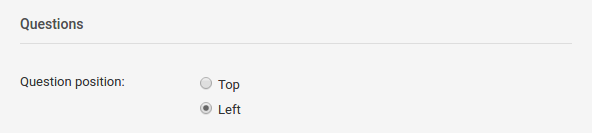
To give you more flexibility, we therefore also provide you with a horizontal layout in which the question gets positioned to the left of the answer. This layout works best for short questions because of the limited space to the left of the answer. On smaller screens—such as smartphones and some tablets—questions will be automatically positioned on top of the answers, due to limited horizontal space.
Header image
One of the most impactful ways in which you can change the look of your questionnaire is to use custom images for its header. By default, the questionnaire doesn’t display header images on neither desktop nor mobile devices, however you can change this by choosing a different option specific to each device type. Switching to either “Logo” or “Banner” will enable you to upload a custom header image via a browser dialog window.
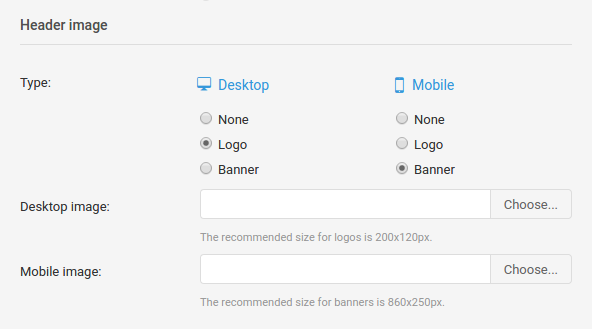
Using a header image as a “Logo” will cause it to show up in your questionnaire’s header right above the hotel name and contact details. This works the same on both desktop and mobile, and we recommend using a transparent PNG image of your hotel’s logo so that it blends in seamlessly with the header background.
Using an image as a “Banner” will have different behaviours depending on device type. Let’s take for example the following banners that were created to be used separately on desktop and mobile, with the hotel information already part of the image and both with the same dimensions:
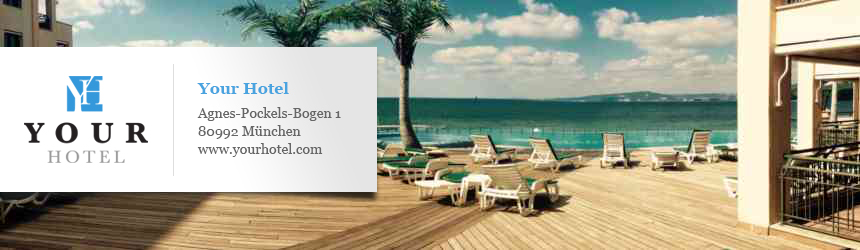 |
 |
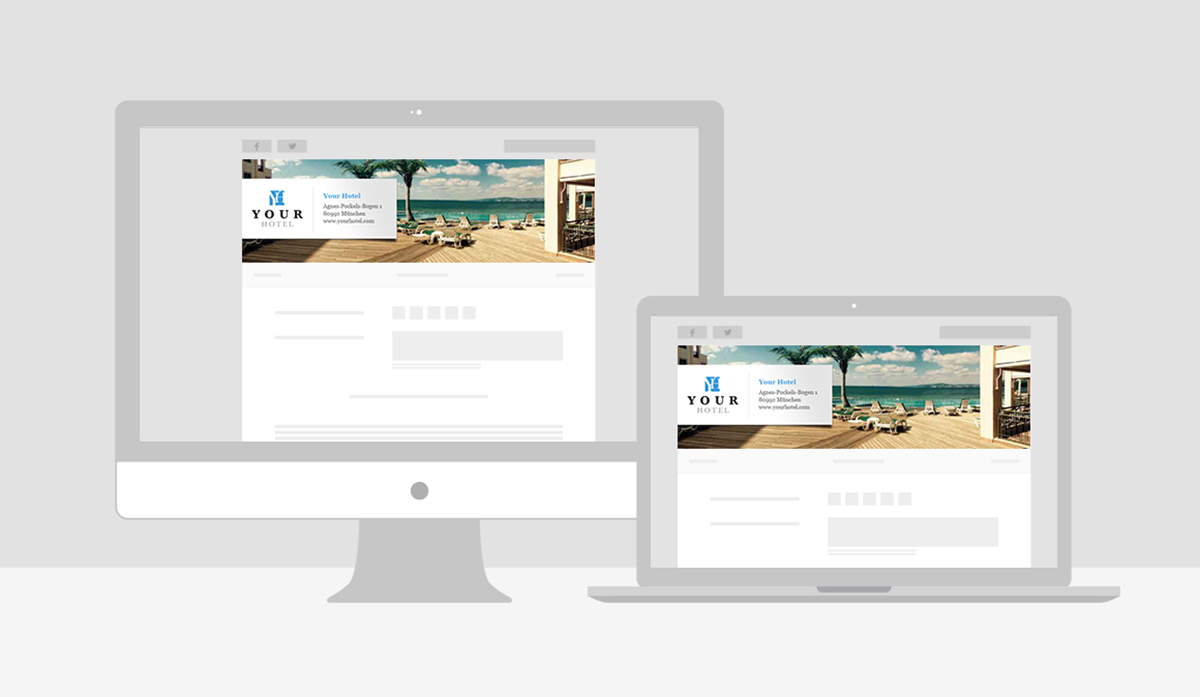
For large desktop devices the maximum width of the banner will be the same as the width of the questionnaire, which is 860px. On smaller desktop screens, both width and height will scale down proportionally.
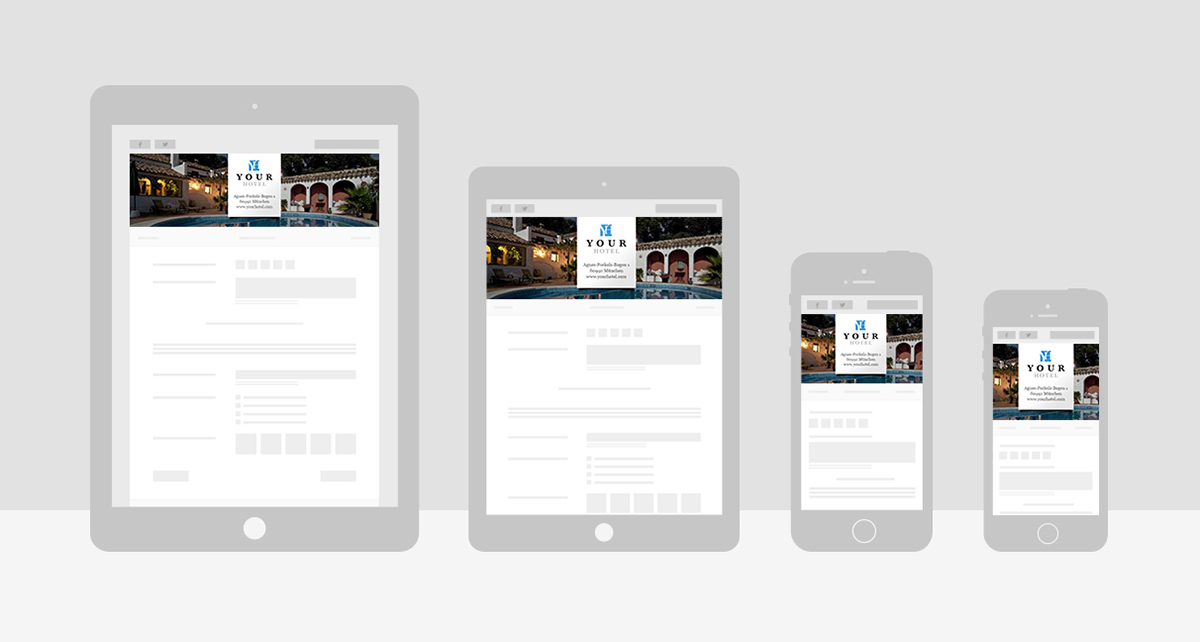
For mobile devices on the other hand, the questionnaire will become as wide as the device screen and therefore the banner itself will have a fixed height and only display as much width as it is available in the given screen size. This means that any important information in the mobile banner should be placed in the center because both left and ride side will be cropped, as shown in the examples below.
Alerts
Configure your action alerts by selecting who they should be assigned to and the due period for the alerts.
Customize your survey (Mailing Settings)
You have the chance to customize your post stay and reminder email if you are using our mailing to send survey invitations to your guests. If you would like to send post-stay emails to your guests using our services, please contact service@trustyou.com.
Messages
Select the language for which you would like to make edits and then begin editing the text for your post-stay email. Please pay attention to the placeholders from the default text:
Here are the placeholders in the email texts:
{guest_first_name} – guest first name as stated in the file upload
{guest_last_name} – guest last name as stated in the file upload
{button} – link to the survey
{hotel} – hotel name
You can also customize the text for reminder emails if you want it to be different than the post-stay email. You can read more about reminder emails in the Review Distribution section below.
To make it easier for you to translate these messages you can view the original text by checking the box after the translation menu.
Look & Feel
This lets you customize the colors of emails that you send your guests.. Simply click the alphanumeric code for a color to change it.
Similar to the survey settings you can choose to use a custom header image or just stick with the default one instead.
Please note that all the look and feel settings are applied to both the post-stay email as well as the reminder email, if it is enabled.
Data Upload
You can upload files with an Excel spreadsheet or a CSV file. The specifications of the CSV upload can be found under Upload CSV File.
If your hotel uses a property management system (PMS) then you can set up automatic daily uploads for your guest data to our servers. In order to have this set up you should get in touch with our Client Success Team.
If you’re using an Excel Spreadsheet, click Copy and Paste from Excel. You only need to paste the data (to do so press Ctrl + V), not the column headings. Contact us to receive a template or join one of our free TrustYou Survey webinars to learn more about the upload. You can sign up for a webinar here: www.trustyou.com/events/calendar
Post-stay emails will be sent to your guests two days after the indicated departure date. On top, we have implemented a suspend functionality for your frequent travelers in order to avoid sending them too many emails. They are per default blocked from new post-stay emails for the next 30 days once they have received your email. This timeframe can be customized as you like. To implement a custom suspension timeframe, please get in touch with our Client Success Team.
Note: The language column uses a 2 lowercase character code to define language according to ISO (639-1) format. If you have any questions about how to set up language codes, please contact us at service@trustyou.com.
Review Distribution
Choose if you want to send a reminder email to guests that did not write a review 5 days after receiving your email. The text for this email can be changed in the Messages section described above.
You also have the option to send a HolidayCheck link only for German.de email addresses (ending in .de) and to select the percentage of uploaded guest data that you want to use to collect reviews from other portals.. Use the range bars to select a threshold for each portal.
Send your survey to guests
You have several options to collect feedback from your guests:
- Send post-stay emails to your customers (as described in the previous section)
- Ask for feedback in the hotel via a tablet computer
Collect feedback inhouse – Tablet Survey
You can use the survey to collect feedback for your guests via a tablet PC e.g. during the checkout process.
To get started, click on the settings icon next to your hotel name and tick Reload review page after submit in the general settings section. This ensures that the survey will automatically reload after 15-20 seconds once a guests submitted a comment in order to have the online form ready for the next customer. Copy the link displayed above and you are ready to go.
Alerts
Survey alerts allow you to receive an alert if a client responds to a specific question in TrustYou Stars or if a new review comes in for a survey. They can be real-time email alerts or restricted to a daily digest of information.
With alerts triggered by a question, users are alerted when guests submit the survey with certain answers that have been selected to trigger the alert. Only questions where a defined selection is given in the survey can be set up for the alerts. Thresholds can also be used to define the alerts.
You can start setting up the alerts in the survey settings or the settings of the TrustYou application.
To activate the alerts in the settings of the tool, go to Settings and scroll down to Alert Rules.
Here are the steps to add a new rule:
- Click on Add new rule.
- The rule panel will open up for you to make your selection for the rule.
- Select if the rule should be applied to a particular hotel or to your survey template.
- You can then select the hotel and survey the rule should be applied to.
- Within the question option, you can select which question you would like to set the rule for or if it should be triggered by any review coming in.
- If you select Any Review, then you will receive real-time alerts.
- If you select to be alerted on a question, then select the answers that should be given for an alert to be sent.
- If the question selected is a score, you are able to select a threshold for the alert.
- With alerts triggered by a question, you can select if it should be sent to you as a daily digest or real-time email.
- Click on Save when you have selected all options.
To be able to create alert rules, it needs to be activated on your account. If you do not see this option in the settings, please contact service@trustyou.com to have this activated for you.
Rules set for survey alerts do not only trigger an email but can also be managed in the tool as action alerts.
You can see the selected rules in the Alert rules section of the settings. Use the filters at the top of the table to change the displayed rules. Remember to click on Apply if you change the filter selection.
You are able to find the action alerts received in the Dashboard or Portfolio within the tool. In any of these tabs, click on Add tiles to select to add the Action Alerts Tile.
You can use the filters at the top to select all alerts and use the provided options to either Reopen, Close or Delete an alert. Remember to click Apply when any of the filter selections are changed.
By clicking on configure rules in the Action Alerts Tile, you are taken back to the settings where the alerts were set up.
You can also click on any of the alerts received within the tile to open them up. You have the option to Respond, Open in reviews inbox, Comment, Mark as closed or Delete the alert. You can also assign the alert to someone else within your user group. Click on Save changes when done. If you decide to select Open in reviews inbox, you are taken to the Reviews Tab where the survey related to the selected alert is shown.
There are other settings for your action alerts in the Survey Tab. When you open up the survey settings, you will see a section called Alerts. Within this section, you can choose to whom the alerts should be assigned to as well the number of days an action is due for the alert before it becomes overdue.
Survey Best Practices
There are many different ways to solicit feedback from your guests, and a lot of different questions you can ask. With that in mind, we have a few guidelines available in order to get the most relevant feedback from your guests when you perform a survey. Please keep in mind that these best practices are general guidelines, and your needs may be better served by using different methods.
- Tell your guests they will receive a survey, how long it will take, and why you’re sending a survey ahead of time. Your guests receive many emails every day. Letting them know to expect your message will allow the guests who are most likely to provide valuable feedback to look for it in their inbox. If you tell guests why they’re receiving a survey, they’re more likely to provide feedback. Letting your guests know how long a survey will take will allow them to make time to fill it out. Example: “After your stay, we’ll email you a short survey so that you can give us feedback about your visit. It should take about 5 minutes to fill out.”
- Keep it short & simple. Remember, your guests are doing you a favor by providing feedback—don’t take up more of their time than necessary. Typically 1-2 dropdown/checkbox answers, 3-5 ratings, and one long text answer will take your guest about 5 minutes to fill out. As a general rule, don’t ask for more than 1-2 long text answers.
- Review your hotel’s reviews and ratings from review sites before you set up a survey. This will give you an idea of what areas your survey may need to concentrate on in order to make positive changes at your hotel.
- If you’re planning on providing your survey in multiple languages, hire a professional localization service or have a native speaker write the translations. Google Translate is an amazing tool for communicating 1-1 in languages you aren’t fluent in, but it still occasionally provides mis-translations. There are many companies that offer this service, and it can be costly. If you’re having trouble finding one, feel free to contact us at service@trustyou.com and we’ll see if we can’t help you find a suitable service or if there’s someone on our team who can help. When in doubt, send the survey in your native language.
- Rely on your staff for feedback as well. Your survey won’t tell you everything. Train your staff to collect customer feedback through interacting with guests. Sometimes your most valuable feedback will come from your staff. They interact with your guests many times a day, and are able to see the minor inconveniences that a guest may not mention in their survey. It’s a good idea to have your staff keep a journal of customer feedback that they update at the end of their shift every day. This can also provide valuable information about what to ask on your guest survey.
- Ask questions that you’d rather not have answered. Many surveys focus on asking questions in the hopes of getting positive feedback, and therefore aren’t as effective. Ask about the things your customers are most likely to complain about, and you’ll receive valuable feedback that will help you make changes for the better.
Working with Collected Reviews
When viewing information about the reviews generated from your survey in the statistics flex table, you can change the statistics you are viewing by using the filters above the table. Depending on your account setup, you are able to filter by regions, countries, brands, groups, type of survey, values presented, and timeframe. You can also use the search field to go directly to a particular hotel´s survey.
When you select the filter Values, you are able to select values you would like to see information for. You can then select specific values or tick the option Select all.
Change what time period you see data for by clicking the button showing the current timeframe on the time filter. Remember to click update after you have made any changes. By clicking Reset filter, you can restore the filters to the default settings.
The segmentation filter allows users to filter survey statistics and reviews based on survey answers related to standard questions (does not apply to open text answers).
The segmentation filter also contains datapoints based on the TrustYou mailing functionality and uploading visits into the system.
PMS basic data points: check-in and check-out dates
Any PMS extended data points: to be configurable by contacting us at service@trustyou.com
The Timeframes Filter helps you to see reviews from a specific time range. You can select any of our predefined time ranges, or choose a specific range of dates with From… To…
Please note that any ranges with “Previous” refer only to the last complete time range. For example, Previous 3 Months will show the last 3 complete months of data.
Main data points in the Survey Overview Table:
Uploaded Unique Visits
Number of uploaded guest data, not taking into account the duplicates.
Bounced Emails
Number of emails that could not be delivered.
Mailing Conversion Rate
Number of reviews / number of sent emails (only from guest data upload).
Opened Questionnaire Conversion Rate
Number of reviews / number of questionnaires opened (only from guest data upload).
Response Rate
Response count / reviews count (again, this is based on review dates).
Response Count
Number of responses given in a timeframe (the review date is taken into account, not the response date).
Reviews Count
Number of reviews generated based on guest data upload.
Sent Emails
Number of emails sent to guests through TrustYou´s mailing system.
Suspended Emails
Number of email addresses suspended due to multiple uploads within a predetermined period of time.
Opened Emails
Amount of opened Emails sent via TrustYou
Net Promoter Score (NPS)
The Net Promoter Score is a measure of customer loyalty and is based on a single question: How likely is it that you’ll recommend your property to a friend or colleague. The response options range from 0 (Not at all likely) to 10 (Extremely likely). Responses are then grouped into the segments of promoters, passives and detractors. Subtracting the proportion of detractors from the proportion of promoters and converting it to a percentage gets you the Net Promoter Score.
Overall score (performance)
Score given by every guest who completes a survey.
Overall score (top scores)
The Top Scores value is calculated based on guests that gave your property a score of 9 or 10 for the corresponding question. It shows the percentage of guests that gave you any of the aforementioned scores when answering the question. Using 9 as the threshold, here is the formula used in the calculation of Top Scores: (amount of scores above or equal to threshold * 100 / amount of all scores) [%].
Questionnaires Opened
Unique number of guests (based on uploaded guest data) that opened the survey.
Reviews / Clicks
Submitted reviews compared to the number of opened links [%].
Reviews Count
Number of reviews received by a property for the specificed timeframe.
Uploaded Visits
Number of uploaded guest email addresses.
The time filter also affects the tiles you see at the bottom of the flex table. You can click on each tile to view more information about the statistics within.
- The TrustYou Stars Tile provides you with an overview of reviews pushed to Google and reviews collected through the TrustYou Survey.
- The Google at a Glance table shows you data for the selected time period, the previous period of the selected time frame and the trend. You can track your Google score, reviews, response rate and how many reviews collected through the TrustYou survey were pushed to Google.
- The TrustYou Survey table offers the same columns presented in the Google at a Glance table. The KPIs shown include the post-stay emails, reviews, conversion rate and how many reviews collected through the TrustYou survey were pushed to Google.
- The Reviews Tile shows you a quick picture of the positive and negative reviews your hotel has received recently. Click the tile to expand it and see individual reviews, as well as more information about the reviews listed. You are also able to focus on your survey reviews, which have not been responded to.
Please note it takes 72 hours for a survey review to be published. The time till publication is displayed on the right of the review, under the options button. This publication time gives you the opportunity to mark a review as inappropriate if it contains insulting language, illegal content, or the review was not written by an actual guest of your hotel.
You can also click to open the reviews in the Reviews Tab.
- The General Questions and Category Scores Tile shows you statistics based on information collected using the general questions and detailed ratings option in the survey.
- If you have custom questions set up, you will be able to view statistics in the Custom Questions Tile.
For the above Tiles, the Top Scores value is calculated based on guests that gave your hotel a score of 9 or 10 for the corresponding question. It shows the percentage of guests that gave you any of the aforementioned scores when answering the question.
Using 9 as the threshold, here is the formula used in the calculation of Top Scores: (amount of scores above or equal to threshold * 100 / amount of all scores) [%]
Please note that questions where N/A was choosen are not included in the Top Scores calculation.
- For users sending out the survey using our mailing configurations, you can click on the Mailing Statistics Tile to view information about the status of the uploaded emails and track information pertaining to guest data. Please note that data is only available for the last 30 days regarding uploaded emails.
- Survey Custom Tile
You are able to add custom tiles in addition to the pre-established tiles located at the bottom of the overview table in the Survey Tab.
To add a custom tile:
- Click on Add tiles (This is located on the top right hand corner of the tiles)
- Once selected, click on Custom Tile and Save.
- Name your new tile and select all the values you would like to see within the table of your Custom Tile.
- Click on Advanced settings to hinge the tile on a specific time-frame, rather the selected tile frame located in the filters at the top of the Survey Tab.
- Always remember to click Update once any changes are made.
Note: Please note that within the mailing statistics tile, the three values are not supposed to add up.
Uploaded Guest Data ≠ Sent Email + Suspended Email, as they are each showing the individual value for the selected time frame.
Guest emails are sent 2 days after the departure. For example, if you upload a guest file on September 30th with 5 entries with departure September 30th, you will see the 5 entries reflected in uploaded guest data for September. However, they will only show in October as sent, since the mails are sent 2 days after departure date (October 2nd).
Replying to Collected Reviews
Creating Response Templates
You are able to respond to reviews using our Management Response Templates. Before you start responding to reviews, be sure to set up and customize the response templates in the settings section of the tool. Once in the settings, scroll down to the Set up your response templates section at the bottom of the page.
There are 3 default templates provided for you. One for positive, neutral and negative reviews each. You have the ability to clone any of the templates and then edit them later. Once you are done, you can also delete the cloned templates if you no longer utilize them. If you want to create a brand new template for yourself, click on + Create new template. Be sure to edit all fields according to how you would like to use the template. You can decide if you would like to keep the template as private or share it with other users within your user group. Please note that if you select to add additional languages for your custom template, you would have to include the response in that language yourself. Once done customizing your template, click on save and it will be added to your available templates.
Using Response Templates
If you are using the guest satisfaction survey, you can use the templates by using the respond button in the survey tab. Responses in the survey tab would be sent as an email to the guest. Hence, you may want to keep the same email subject or adjust it yourself and also include your email address in the appropriate field. You have the option to edit the response you want to send and also decide if you would like to include the review text at the end of your email. If you do not want to use any of the default or customized templates available to you, you can select the option No template and type in a new text.
Private & public responses for survey reviews
Gives the possibility to add responses:
Privately sent to the guest via email
Publicly via our widgets
Within the response template you have the option “Send a response to the guest via email”. If this box is selected, then the guest will receive the response, if it is unselected, it will only be added to the widget where the review is located.
You also have the option to send the guest a different email than what is shown in the widget by selecting “Write a different response to the guest”
Creating Multiple Surveys
If you are using our survey platform, you can create multiple surveys on a per hotel basis. You can separate the surveys into Hotel Post-Stay, Hotel On-Site, Food & Beverages, MICE and Attraction.
You can add an additional survey by clicking the + button found next to the hotel name. A box will open up when you can select the setting of the survey. It is advisable to name the survey appropriately to distinguish it from other surveys you may create. The name of the survey is for your use only as guests would only be able to see the hotel name and not the survey name. Once you have created a survey, it will be added to your survey list. When you click on any of the multiple surveys you have created, the tiles below will update with corresponding data.
If you do not have the multi-survey functionality activated and you are interested in adding this additional feature to your account, please reach out to your TrustYou sales contact or send us an email at service@trustyou.com.
Google Rich Snippets
Did you know you can show your TrustScore right on the Google search results page? Integrate the Rich Snippets widget now to increase organic search traffic and provide useful information to potential guests viewing your page. Check out the Google Tile in the Survey Tab to find out the steps involved in the integration.
Reports
Users can create a report by clicking on reports located at the top right section of the application where the settings is located. We’ve created a few preset reports for you in the Global Presets section of the Saved Reports tab that contain all KPIs, but if you need something specific you can always build a custom report.
Custom Reports
When you click Reports, the first section you see are the custom reports.
The Custom Reports allow you to directly export data that you see in the tiles of the application.
Here’s how you can create a custom report:
- Hover your mouse over a tile and a small box will appear near the top-left corner.
- Click this box to add that data to the report. Each tile you add will be a tab in an excel spreadsheet for your report. You can combine tiles from different tabs (Dashboard, Comparison, etc.) to create a comprehensive report of all KPIs that you’d like to track.
- Once you’re satisfied with the KPIs in your report, return to the Report panel & expand the section titled Report Delivery to name your report, choose the format, and enter the email addresses you’d like the report delivered to. If you enter more than one email, separate email addresses with a comma.
- If you’d like to have the report automatically sent out on a daily, weekly, or monthly basis, select I would like to receive this report regularly by email and choose the appropriate options under Report Schedule, then click Add Schedule.
- Click Save to Save the report, Reset to start over, or if you just want the report once, click Generate Now.
You can download generated reports by clicking Generated reports at the top of the reporting panel.
The Global Presets area within the Saved Reports section contains pre-built reports for you that include frequent reported KPIs. Click the different icons to Show the report description, generate it now or Clone and further customize it.
Understand report data points
This area of the guide will help you understand what each section of the select sources page does, along with how each section works together.
Select Sources
Choose the sites that you’d like to receive data from here. TrustYou will deliver data for all of the available sites.
Select Data
Select Data lets you choose the data points you’d like to see in the report. Here’s a breakdown of what each data point means:
- Overall Score = score of your hotel based on all reviews received in the last 24 months
- Reviews = count of reviews
- Reviews to respond = count of reviews that allow for a management response
- Responses = count of responses
- Popularity = how you compare to other hotels (1 of 100 = 100%)
- Performance Score = average of all ratings
- Rank = average of rank for the sites that provide this info
- Response Rate = number of responses/reviews that can be responded to
- Response Rate Distribution = responses for 1 star, 2 star reviews, etc.
- Twitter Tweets = number of tweets you’ve made
- Twitter Followers = number of followers on twitter
- Twitter Following = number of people you’re following on twitter
- Facebook Likes = number of Likes on facebook
- Facebook Checkins = number of times someone has checked in at your hotel using facebook
- Foursquare Tips = number of comments on foursquare
- Foursquare Checkins = number of checkins on foursquare
Select Categories
This lets you focus on specific areas of a guests’ experience in your hotel using TrustYou’s semantic analysis. If you’d like to receive a report of this data, please select TrustYou under Select Sources.
Source Categories
This lists the review sites that give your guests the opportunity to rate different parts of their stay (examples: room, service, hotel, etc.). Select these sources to see reports on how guests rated those categories.
Select Time Ranges
Choose the time you’d like the report to be based on. Keep in mind that choices like “Last X Years/Months” only refer to previous months and years.
If you use a custom range, the report will always only show this range of dates.
Reporting Best Practices
- Only create reports that you need. It’s tempting to get reports on every bit of information that’s available to you, but reports take time to review, so make sure to only create reports that you need. If you find yourself deleting some of your scheduled reports from your inbox, consider deleting them from the schedule & only generating them at need.
- Try to make reports as concise and clear as possible. The more tabs and variables that you have involved, the more confusing your report will be.
Settings
User Management
In the TrustYou application, you will find the option Manage users when you click on your name at the top right of the application window.
When you click on Manage Users, the following options are available to you:
- Create a new user with exact same perimeters as your login.
- You are able to see all users in your user group who have the same default hotel as you as well as their user status.
- You can suspend users.
You can choose to filter the view to see All users, Active users only or Suspended users.
Please note there is a limit on the number of users you can create in your group based on your TrustYou license. If more users are required, please contact service@trustyou.com.
To create a new user:
- Click on: + invite new user
- Edit the First Name:
- Edit the Last Name:
- Input their Email:
- The following permissions are possible to select from: User, Read-only, Admin
- User: Will be able to use all the functionalities from TrustYou Analytics. Will not be able to manage user accounts.
- Read-only: Cannot update, modify, answer to reviews or change the survey. As per its name, this account allows users to only see data.
- Admin: Will be able to use all the functionalities from TrustYou Analytics and manage user accounts.
- When done, click on “Save user”
You can edit current users or suspend them.
When a client leaves the property, you can edit the account details and transfer it to someone else by clicking on Edit user.
Meta-Review
Meta-Reviews allow you to market and influence your reputation across hundreds of sites like KAYAK, Trivago, Wego and more. Get started by integrating the Meta-Review widget onto your website using the link found in the application. Once you’ve added your Meta-Review to your website, make sure to write a quick response to your Meta-Review that will be published on your website alongside the review summary (currently in beta with select customers). Feel free to contact us at service@trustyou.com if you have any questions!
Meta-Review Tile
The Meta-Review tile provides you with a view of what the Meta-Review widget of your hotel looks like.
It provides a number of key data points, indicating a hotels performance on both overall and context specific levels.
The TrustScore provides a general outline of the hotels performance.
The Meta-Review badges provide an overview of your performance and highlights the areas in which your hotel excels.
The Good to know section highlights, concisely, what guests consider to be the most relevant positive/negative points about a hotel, along with some highlight snippets which are frequently mentioned by the guests.
The review summary (the main bulk of the text) contains the most mentioned / most relevant sentiments for a hotel (such as room/pool/food etc.), indicating numerical scores for each of these and providing textual data reflecting the reviews from which we sourced the information.
For the above information, filters can be applied to alter the display to result in a more context/user specific outcome. For instance, when the “business traveler”, traveler type filter is selected, the review summary display and good to know will reflect the view of the business travelers who reviewed this hotel, by only taking into account the reviews ´submitted by these specific guests. In the same sense, the user can filter to see what people writing in a particular language, e.g. French, wrote about a hotel by using the language filters.
Response Tile
Respond to your Meta-Reviews and highlight actions taken to address any negatively rated points about your hotel.
To respond to your Meta-Review:
- Select the language you would like to insert your text in
- Include the responder Name and Occupation
- Insert your response message
- If you would like to translate to other languages, select the language and follow the 2 steps above
- Either select Save draft or Submit for review
Your response will only be pushed after having been manually verified by TrustYou against these rules:
- Be constructive: No offensive language. Don’t contradict information shown on the website.
- Be professional: Don’t attack reviewers or disclose personal information.
- Plain text: Don’t put web links in your message.
Widgets Tile
The Widgets tile is used to configure and customize the widgets for your hotel. Here is the list of widgets that can be configured from the tile:
- Meta-Review
- TrustScore
- Badges
- Survey Reviews
- Social Gallery
The TrustScore widget in the Meta-Review tab includes information on integrating the embedded TrustScore widget on your website.
This iframeless widget allows you to markup your website for Google to start showing Rich Snippets. Have a look at the tile for integration specifications.
Generate widget code:
After making changes, click on Save changes. Clicking Save changes does not automatically update this widget on all of your websites. To do this you have to manually copy and paste the newly generated embed code on each of these websites.
Click Reset widget to go back to the default settings.
Social
Get an overview of your social media stats
Add or change your social media accounts
To add or change social media accounts, click the gear next to your hotel’s name in the top panel on the Social Tab. Hovering over the ? provides examples on how to connect your accounts. Click Save to save your changes.
Should you encounter any challenges during the setup process, please contact us at service@trustyou.com and we will be pleased to assist you.
Keyword Search
Keyword search looks across social media sites for mentions of any words or phrases that you define. Click the gear next to the name of a hotel to set up the social keyword search.
Enter each search term on a new line (max of 3), and if you’d like to have exact matches, put the entire phrase in “”, “like this”.
Use tiles to see a quick overview of important data
The Social Tab tiles are a great way to see the most relevant information about a hotel’s social media presence in one place. Across the top of the Social Tab, you’ll see the timeframe you’re looking at data from.
Click any tile to see a more detailed view of the data presented. The tile will expand and show you more information. Click the tile again to exit the detailed view.
Click Add Tiles to add new tiles to your Dashboard. You’ll be able to add any preset tile that doesn’t already exist on your social tab. Click and drag a tile to move it.
You can remove tiles by clicking the x at the top corner. When you remove a tile, it’s not deleted permanently—you can always add it back by clicking Add Tiles.
Filter the information in your social statistics table and tiles
You can change the statistics you are viewing by using the filters above the table. When you select the filter Values, you are able to select which social platform you would like to see information from. You can then select specific social statistics or tick the option Select all.
When you go into the Advanced settings, you are able to define each column that appears on the table. Firstly you need to select which value you would like to see, choose if you would like to use the selected timeframe in the filter, or choose a specific timeframe that would relate solely to that column.
Change what time period you see data for by clicking the time filter. Remember to click update after you have made any changes. By clicking Reset filter, you can restore the filters to the default settings.
Note: Keep in mind that times listed as “Previous X Month(s)” only reference the past complete months/years. For example, if today is May 15, and your timeframe is set to Last 3 Months, you’ll see data from Feb 1 to April 30.
Retweet, Favorite & Reply with the Twitter tile
The Twitter tile helps you Retweet, Favorite, and Reply tweets that your guests or partners have sent out on Twitter. Click the tile to expand it, then click the gear next to a tweet for more options.
Find out how your hotel is performing on Facebook
The Facebook tile gives you an overview of your posts and posts by others on your timeline. Click the gear next to a post to see more options.
Monitor your hotel’s Foursquare checkins and tips
The Foursquare tile shows an overview of checkins and tips for your hotel.
Get an overview of your social media Klout
Klout is a score that aggregates your social media activity across many platforms. The Klout tile helps you monitor and track your Klout score.
Find photos guests take at your hotel with Instagram
Our new Instagram tile will show what you’ve posted with Instagram and give you a quick overview of your comment, love, & follower counts.
Find pictures guests have taken with Flickr
TrustYou will search for flickr photos taken at your hotel and show them in the flickr tile.
Find videos featuring your hotel with the YouTube tile
The YouTube tile will search for videos with names or descriptions that match the exact name of your hotel. Click a video to view it on YouTube.
See what bloggers are saying about your hotel with Blogs Search
We’ll search for your hotel’s name on blog sites so that you can get an idea of what guests and bloggers are saying about your property.
This is a great place to find links to great articles about your hotel to send out on social media.
Follow your guests’ discussions with Forum Search
We’ll search for your hotel’s name on forum sites so that you can get an idea of what guests and others are saying about your property.
This is a great place to find guests who may not be 100% satisfied with your hotel, and find a way to reach out to them in order to ensure that they have a great experience.
Use Hootsuite without having to leave TrustYou
The Hootsuite tile lets you sign in to Hootsuite without leaving TrustYou. Click the tile to expand it, enter your credentials, and hoot away!
For more information on Hootsuite, please visit Hootsuite’s website (www.hootsuite.com).
Monitor your Weibos & mentions with the Weibo tile
Weibo is a Chinese microblogging site similar to Twitter. With the Weibo tile, you can monitor your hotels’s Weibo account and mentions.